
Learning how to join two pieces of wood together is an essential woodworking skill. There are many different wood joinery techniques you can use and in this post we’ll cover the 18 most common types of wood joints and how each is made, as well as some tips on how to choose the right wood joinery method for you!
1. Square-Ended Basic Butt Joint
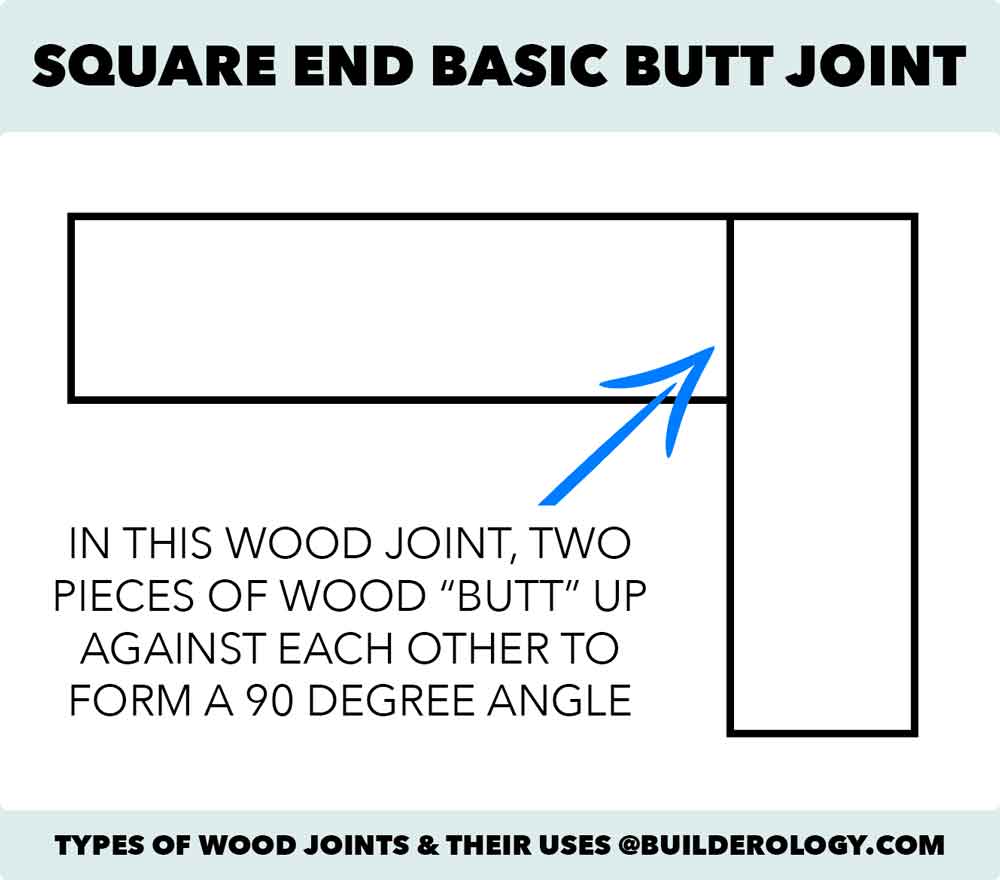
This is the most simple and straight forward way of making 90 degree wood joints, but it is not always the strongest or the best choice for every project.
In a square ended basic butt joint, one piece of wood butts up against another, most often perpendicularly at a right angle.
Since glue alone is typically not strong enough to make a sturdy butt join, it is usually necessary to hold the pieces together with fine nails, screws or other types of fasteners to make the joint stronger.
2. Edge-to-Edge Butt Joint
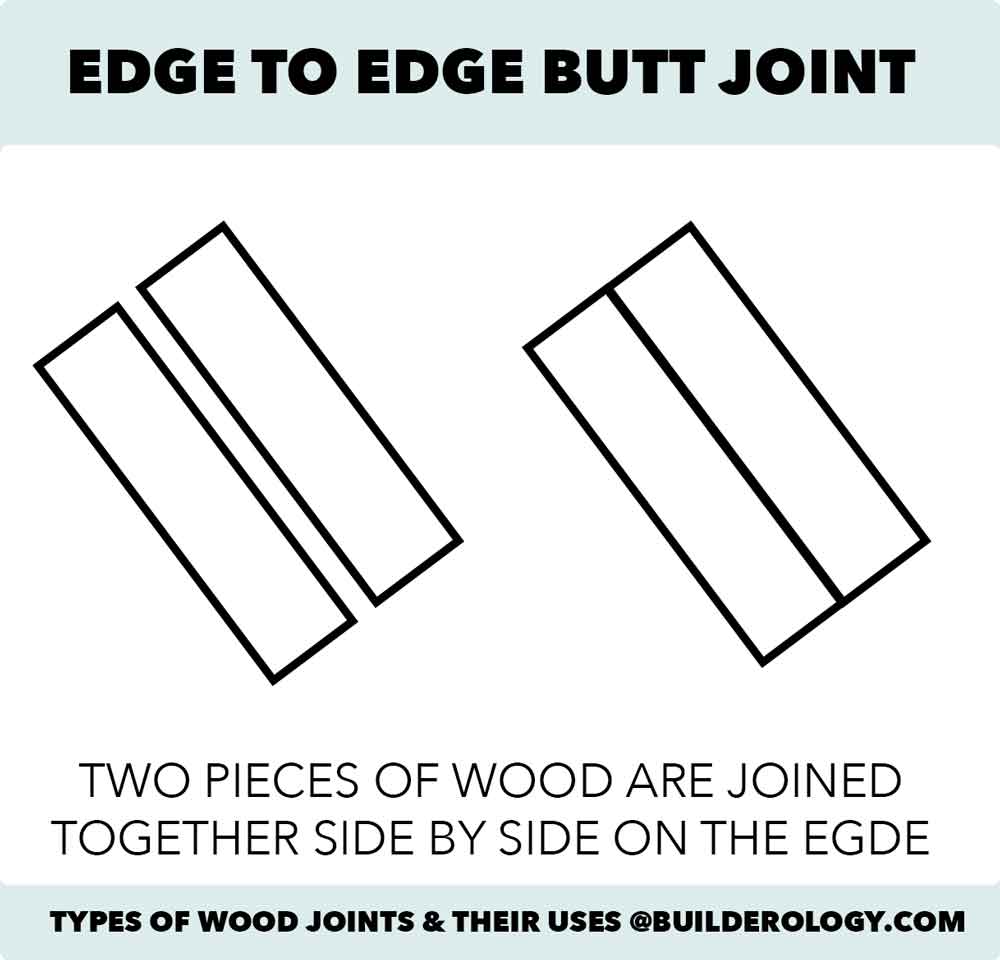
An edge to edge butt joint is similar to a square-ended butt joint, except pieces of wood are laid side by side on the edge. This is typically done to make a panel of wood from multiple pieces.
This type of joint is not very strong and difficult to reinforce with metal fasteners. If the two pieces of wood you are joining together are more than 12 inches long, it is typically necessary to instead use an edge to edge dowel joint or biscuit joint – which we cover in more detail later in this post.
3. Mitered Butt Joint
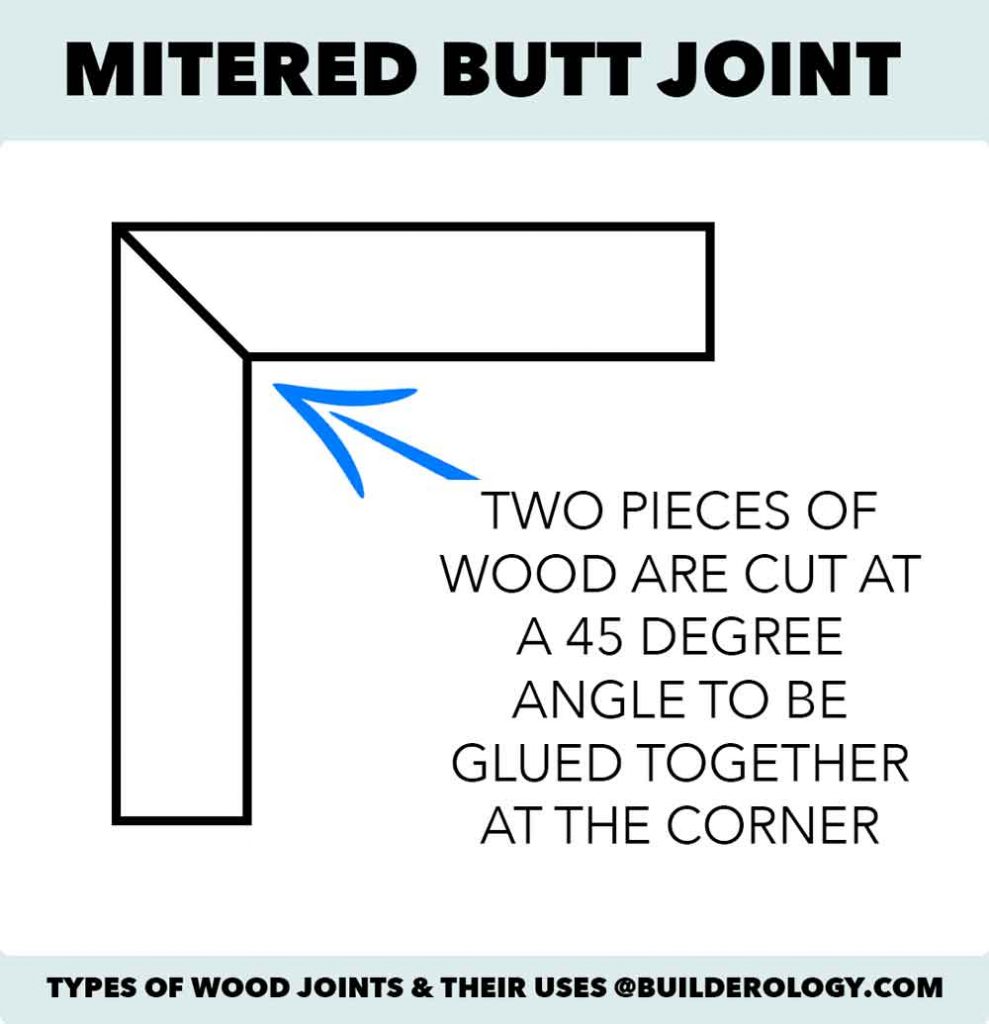
Mitered Butt Joints are used to make a neat right-angle corner without any visible wood grain. While mitered butt joints typically look the neatest, they are not always the strongest or most durable – so this type of joint is usually reserved for light duty projects such as photo frames.
To make a mitered butt joint, cut the edge of the wood at a 45 degree angle. To fasten the two pieces together, add glue and clamp until the glue dries.
4. Tongue-and Groove Joint
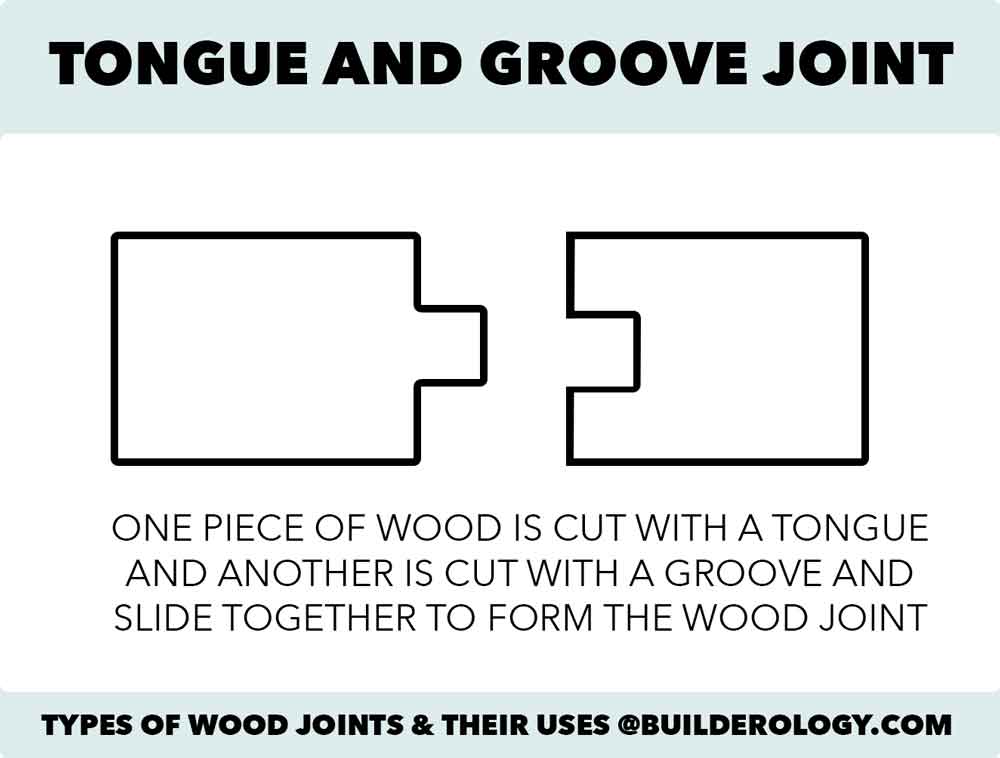
A tongue and groove wood joint is often used instead of edge to edge butt joints and it easily allows for one piece of wood to slide into another. Tongue and Groove joints are much more stronger and can typically be seen in applications such as flooring.
To cut a tongue-and-groove joint by hand, it is usually necessary to have tongue and groove router bits. One bit is used to shape the tongue on one piece of wood and the one is used to make the groove. Cut the tongue first, then change the bit and make the matching groove.
Tongue and groove router bits come in a wide variety of different sizes so make sure you order the right size that will fit your project.
5. Right Angle Dowel Frame Joints
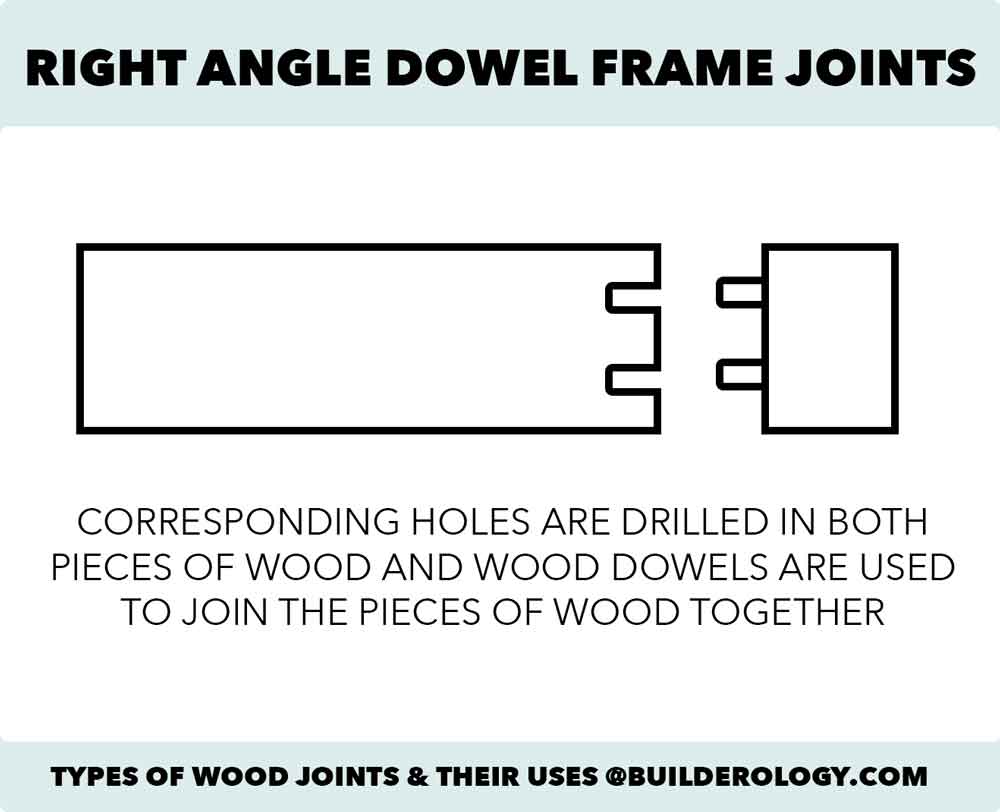
Dowel frame joints can be a lot stronger than you might think. Many furniture builders use dowel frame joints for a variety of different applications – from chairs to dresser drawers and more.
Note that fluted or spiral cut dowels are best as this gives additional “grip” compared to smooth dowels. Most hardwood stores sell packages of pre-cut wood dowels specifically for wood joinery that you can use.
To make the dowel frame joint, drill two holes that match up with each other in 2 pieces of wood. Insert the dowels with some wood glue in one piece of wood, and then add glue and attach the second piece of wood so the dowels slide in the holes you drilled.
In most cases, two dowels per joint are sufficient. Be sure they are at least a minimum of ¼ inch from both edges of the rail. For longer pieces of wood, you may want to use 3 or 4 dowels.
The advantage to this method is it can be simpler to make than box joints or dovetail joints and doesn’t require any specialized tools – just a drill!
6. Edge-to-Edge Dowel Joint
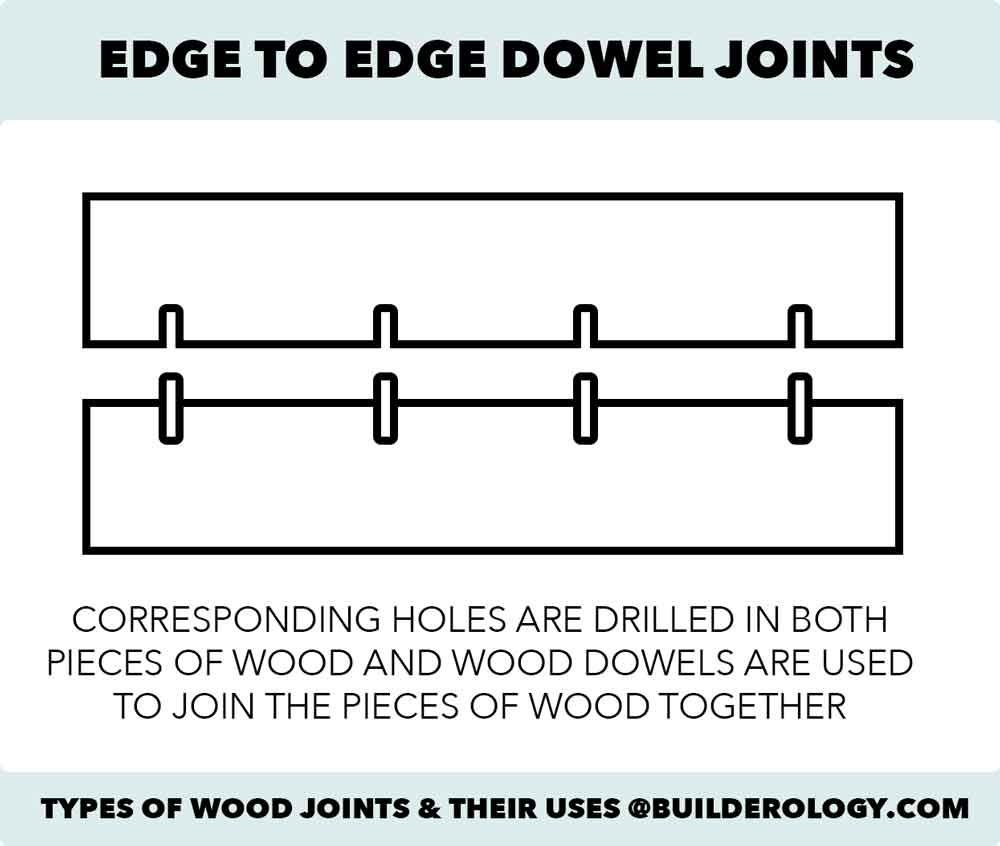
An edge to edge dowel joint is constructed very much like a square ended dowel joint, except in this case you are joining two pieces of wood side by side instead of perpendicularly at a 90 degree angle.
Depending on the length of your project and desired strength, you can insert dowels every 6, 9 or 12 inches apart. The more dowels = more strength, so consider the application for what you are using the dowel joint for.
7. Biscuit Joints
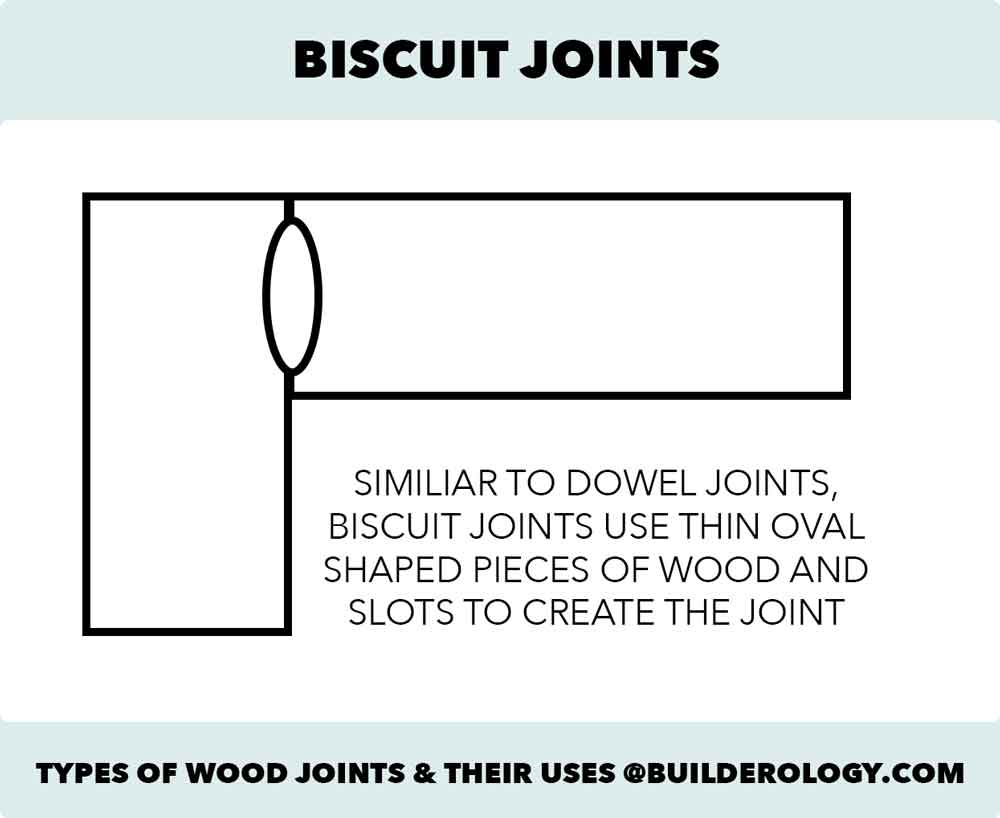
Biscuit joints are similar to dowel joints, except instead of dowels one uses “biscuits” which are small, flat oval shaped pieces of wood.
Biscuit joints are not typically as strong as dowel joints, but most hardwood stores do carry the wood biscuits in stock. One disadvantage to making biscuit joints is they typically require a specific tool called a biscuit plate joiner.
To make biscuit joints, the plate joiner is used to create slots where the biscuits will fit inside. You then glue together the biscuits into the slots with the adjoining piece of wood.
8. Mortise and Tenon Joint
A Mortise and Tenon joint are one of the stronger types of wood joints and have been used for many different types of wood projects and even larger construction projects such as barns and sheds.
The mortise is a hole and the tenon is a “tongue” that fits into the hole.
One of the challenges with making mortise and tenon joints is ensuring the tongue and mortise fit each other. When making these joints, it makes sense to always cut the mortise first. This way you will have an easier time making the tenon fit exactly. Fortunately, one can typically do this with basic tools such as saw!
Once the mortise and tenon are cut, you can then simply connect the two pieces with a bit of wood glue.
9. Corner Bridle Joint
Similar to a mortise and tenor joint or tongue and groove joint, with a corner bridled joint you are creating a slot in one piece of wood and cutting the other piece of wood to fit into the slot.
Many people often opt to insert two dowels through the side of the joint after the glue has set to improve the strength of this joint.
10. Mitered Bridle Joint
The mitered bridle is cut in a similar fashion as the conventional corner bridle joint, but is a more attractive alternative, especially for uses like picture frames.
To make a mitered bridle joint, you would cut the pieces of wood at a 45 degree angle, but allow for the tongue/groove portion of the joint to be square.
12. Half Lap Joint
A basic half lap joint is only a little bit stronger than a regular butt joint, but it can offer somewhat of a neater appearance with much of the end grain concealed.
Lap Joints are sometimes used to connect a drawer front to drawer sides or can be used when making a simple box.
In a lap joint, pieces of wood are typically cut or notched in half and the two pieces are joined by overlapping one piece with the other.
13. Box Joints
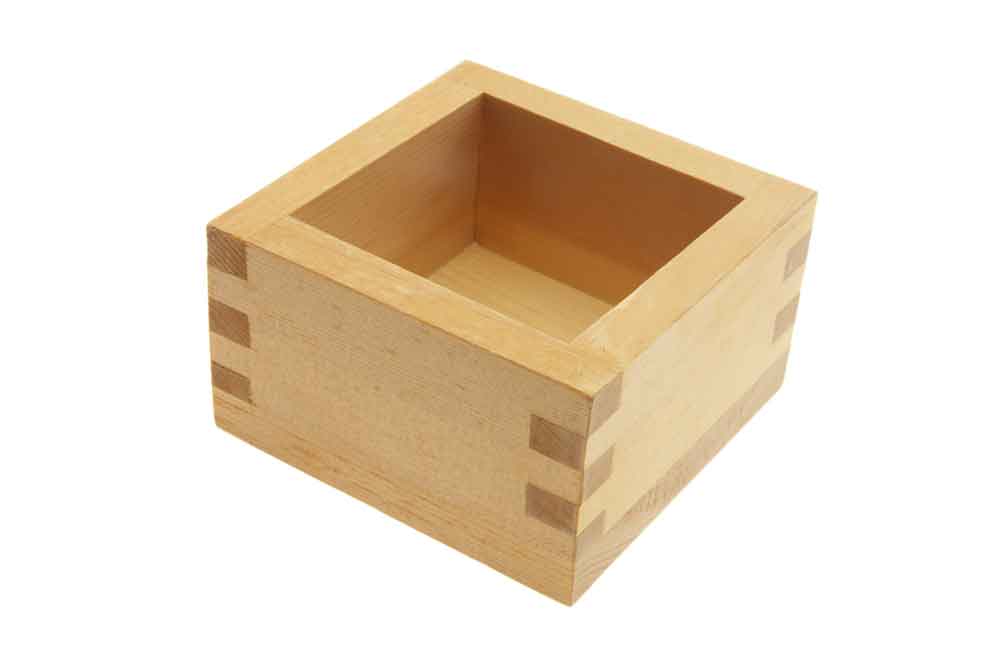
Box joints are an easy method of joining together pieces of wood when making a box. They are squares and square grooves cut out alternately on two edges of wood so that when you fit them together the squares line up to make a clean edge.
They can often times be hand cut simply with a saw, although of course there are router accessories sold that can make cutting them an easier task.
14. Dovetail Joint
Dovetail joints are probably one of the strongest types of wood joints and they can also give a nice look on a finished edge. Dovetail joints are often seen in box construction and drawer construction.
Dovetails are similar to box joints, but the “tails” are cut at an angle to provide additional strength.
Dovetail joints can be cut by hand using a saw or you can use a router. Cutting dovetail joints on a router is much easier when you make use of dovetail joint jig and template. Most router manufacturers sell this as an accessory.
15. Half Blind Dovetail Joint
A half blind dovetail joint makes sense when you want to join together two pieces of wood for a box, but do not want the dovetails to be seen from both sides.
Half blind dovetails are made very much in the same way as regular dovetail joints, except they are only cut half way through the corner, leaving a clean edge on the outside of the wood. This is a popular choice for drawer makers.
16. Sliding Dovetail Joints
Sliding dovetail joints are another popular option with many uses. In this type of joint, rather than cutting individual dovetails, the entire length of one board is cut into the dovetail shape, while the other piece of wood has a long groove.
Once the cuts are made, it is as simple as applying a little bit of wood glue and sliding the pieces of wood into place.
While it is certainly possible to cut a sliding dovetail by hand, these are made easily on a router with the proper attachments and accessories.
16. Finger Joint / Comb Joint
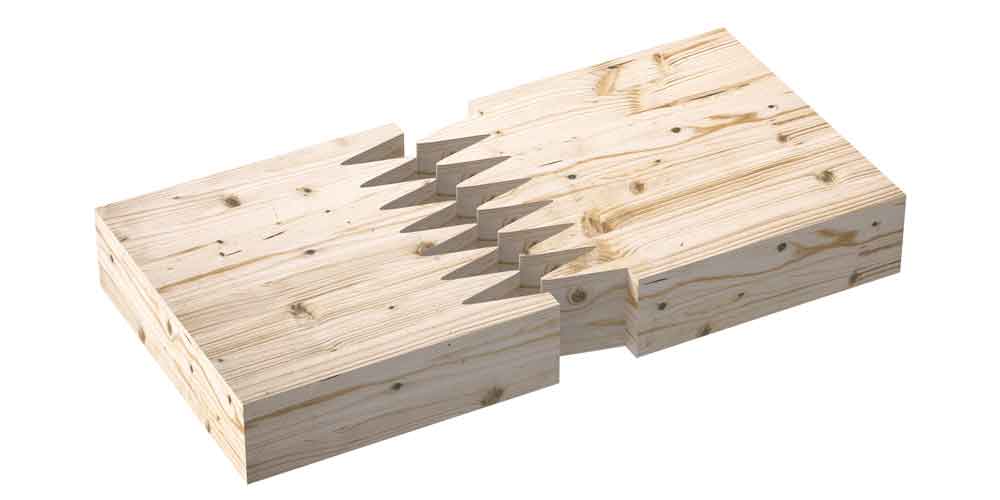
Finger joints are very similar to dovetail joints, but the edges are usually cut in a saw-blade or comb like pattern.
Finger joints can be very strong, but some people do not like to use them because the zig-zag comb pattern is not something they want seen on the outside of their project. Of course, sometimes the design of these joints can be beautiful and add character to a piece.
To make finger joints, it is usually best to use a specific finger / comb router bit in order to make sure the two edges will line up together. Once the pieces are cut, simply apply glue and allow to dry.
17. Dado Joint
Dado joints are most commonly used when joining wood pieces together in a T-shape, such as making dividers in a box or drawer.
This is a very simple joint to make, where you simply cut out a slot or groove for the other piece to fit in perpendicularly. They can then be attached with wood glue.
18. Rabbet Joint
Rabbet joints are very similar to half lap joints and dado joints, where one half of each end is cut so that they fit together.
They are relatively easy to make as it is a straight cut on each board. They can then be glued together.
Rabbet joints are not the strongest, but it is a wood joinery technique that is often used in cabinet making and for the backs of shelving and drawers.
Which Type of Wood Joint Should I Use For My Project?
For many people, the type of wood joint you use is usually all a matter of personal preference. However, it is important to consider the use of the item you are making, as not all joints are created equal! Here are some things to consider:
How Much Strength Do You Need?
If you are building something that will be subject to everyday use, it makes sense to use one of the stronger types of joints, such as dovetail or box joints.
For example, these two types of joints are frequently used in making drawers, which makes a lot of sense if you consider they are holding potentially heavy items and are opened at least once or twice a day if not more.
Photo frames on the other hand are something that are very rarely touched and handled after the artwork or photo is inserted and they are hung on a wall. In that case, it makes sense that a simple miter butt joint will do!
What Tools Do You Have?
Another thing to consider is what tools you have available to you. While there are plenty of great router bits and accessories that make cutting out sophisticated joints easy, it’s not always in everyone’s budget to even own a router, let alone all the bits and templates.
If budget is a concern, dowel joints are a great choice – all you really need are the wood dowels which are usually sold in packages at hardwood stores and a drill and some wood glue.
Box joints, dado joints, half lap joints, and rabbit joints are also good choices if you are on a budget because you can typically make these very simply with just a saw.
Do You Want to Be Able to See the Joint?
There are arguments on both sides on whether a joint should be visible or not. Some people who make decorative boxes for example might argue that a dovetail or finger joint adds to the overall design.
On the other hand, someone may not like how the joint looks and instead opt for “invisible” joints, such as a half blind dovetail joint, biscuit joints or dowel joints.
All in all, there are many great wood joinery techniques listed here to learn how to do and experiment with! I hope this list of different types of wood joints is helpful for you and of course I’d love to hear from you in the comments section – tell me what types of joints for woodworking you like to use in your projects below!
Thank you so much you’ve been a great help to an extremely novice wood worker
Glad it was helpful for you Liz!